|
European 1 into 4 Mail
|
|
Basic Pattern
|
 European 1 into 4 is the standard mail pattern that has been used since about the 2nd Century B.C.E. This section explains the basics on how to construct European 1 into 4. This section also contains information that is important for understanding the rest of the patterns on this site. European 1 into 4 is the standard mail pattern that has been used since about the 2nd Century B.C.E. This section explains the basics on how to construct European 1 into 4. This section also contains information that is important for understanding the rest of the patterns on this site.
The most important secret from this site that will help you to understand the patterns as you add links isn't really a secret at all; it is the pattern names themselves. For example, "European 1 into 4" means that every link in the pattern goes through 4 other links. If the link you're adding goes through 2 links on the existing pattern, then it must also go through 2 new links - 1 link through a total of 4. If the link you're adding goes through 3 links on the existing pattern, then it must also go through 1 new link - again, 1 link through 4. |
|
The ratio of links for this pattern is 1 Closed Link to 1 Opened Link.
|
|
Starting the First Pattern
|
|
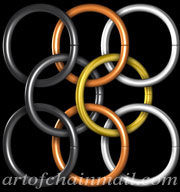
Step 1
|
|


|
|
|
Step 2
Layout
|
|

|
|
|
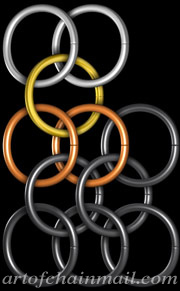
Step 3
Adding to the Column Edge
|
|
 |
|
|
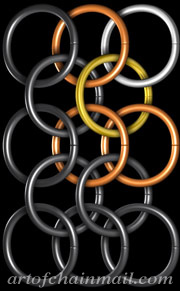
Step 4
Adding to the Row Edge Start
|
|
|
|
|
Step 5
Adding to the Row Edge
|
|
 |
|
|
Expanding
|
|
Before going on to expand the pattern, learn more patterns or build actual projects, there are a few elements of the European Pattern that you must understand.
These elements are : Alternating horizontal rows... 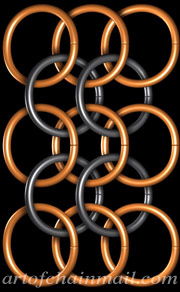 ...where the links overlap... 
and alternating vertical columns... 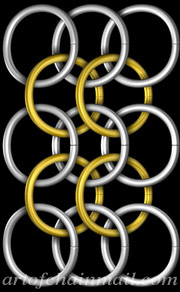 ...where the links lay beside each other. 
|
|
A Final Note
|
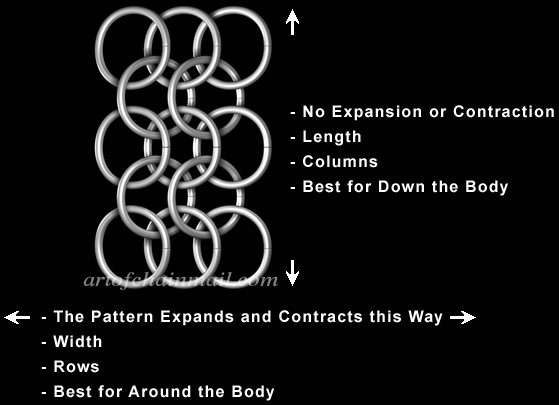
The alternately overlapping Rows of European Mail allow pattern to expand and contract. This is why the Rows were made to go around the body in historical Mail Shirts.
|
