|
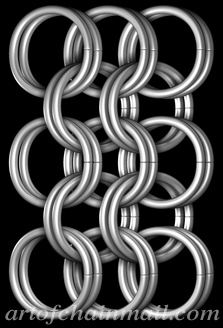
European 1 into 8 King's Mail
|
|
Basic Pattern
|
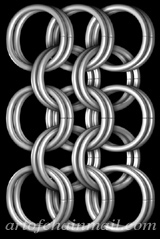 European 1 into 8 King's Mail is a basic advancement of European 1 in 4 that simply doubles the links for added strength. European 1 into 8 King's Mail is a basic advancement of European 1 in 4 that simply doubles the links for added strength.
As far as I'm aware there is no historical basis for this pattern.
King's Mail can be used to create some interesting decorative patterns by using different coloured links for the "inner" and "outer" sides of the pattern. In fact, it is possible to create entirely reversible pieces with this pattern.
|
|
|
|
The ratio of links for this pattern is 1 Closed Link to 1 Opened Link.
|
|
|
|
|
|
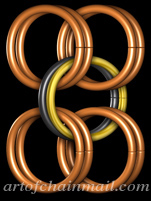
Step 1
|
- Place an open link through eight closed links.
- Close the open link.
|


|
|
|
|
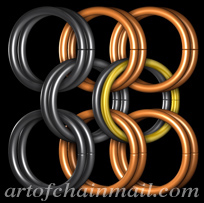
Step 2
Layout
|
- Lay the first nine links out as in the illustration.
|

|
|
|
|
Step 3
Doubling the Initial Link
|
- Place an open link through the 8 closed links coloured copper in the illustration.
- This link lays beside the initial open link.
- Close the open link.
|
 |
|
|
|
|
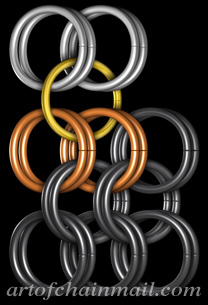
Step 4
Adding to the Column Edge
|
- Place an open link through 4 closed links.
- Place the open link through the 4 column edge links coloured copper in the illustration.
- Close the open link.
|
 |

|
|
|
|
Step 5
Doubling the previous link
|
- Place an open link through the 8 closed links coloured copper in the illustration.
- This link lays beside the previous open link from Step 4.
- Close the open link.
- Repeat Steps 4 and 5 to make the pattern wider
|
|
|
|
|
|
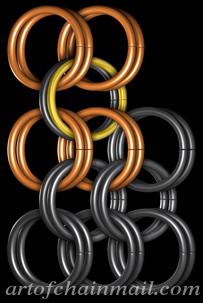
Step 6
Adding to the Row Edge Start
|
- Place an open link through 4 closed links.
- Place the open link through the 4 row edge links coloured copper in the illustration.
- Close the open link.
|
|
|
|
|
|
Step 7
Doubling the previous link
|
- Place an open link through the 8 closed links coloured copper in the illustration.
- This link lays beside the previous open link from Step 6.
- Close the open link.
- Repeat Steps 6 and 7 each time you start adding a row.
|
|
|
|
|
|
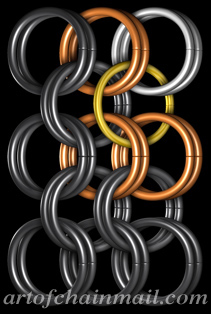
Step 8
Adding to the Row Edge
|
- Place an open link through 2 closed links.
- Place the open link through the 6 links coloured copper in the illustration.
- Close the open link.
|
 |
|
|
|
|
Step 9
Doubling the previous link
|
- Place an open link through the 8 closed links coloured copper in the illustration.
- This link lays beside the previous open link from Step 8.
- Close the open link.
- Repeat Steps 8 and 9 to continue a new row, making the pattern longer.
|
|

|
|
|
|
Finished European 1 into 8 King's Mail
|
|
|
|